引言

RabbitMQ 是一个开源的消息代理软件(消息队列),实现了高级消息队列协议 (AMQP)。它常用于分布式系统中处理异步通信、任务队列和系统解耦。本文将指导您安装 RabbitMQ,并提供 ThinkPHP 中的简单示例,帮助您快速上手。

目录

基础概念

RabbitMQ 是基于 AMQP(高级消息队列协议)的消息代理。核心组件包括:

  • 生产者 (Producer): 发送消息的应用程序。
  • 消费者 (Consumer): 接收并处理消息的应用程序。
  • 队列 (Queue): 存储消息的缓冲区。消息在队列中等待被消费。
  • 交换机 (Exchange): 接收生产者消息并根据规则路由到队列。有四种类型:Direct、Fanout、Topic 和 Headers。
  • 绑定 (Binding): 交换机与队列的关联规则。
  • 虚拟主机 (Virtual Host): 逻辑分组,用于多租户隔离。

这些组件确保消息可靠传递,支持异步通信和系统解耦。

工作模式

RabbitMQ 支持多种工作模式,适用于不同场景:

  1. 简单模式 (Simple): 一个生产者直接发送消息到一个队列,一个消费者消费。适合基本任务。
  2. 工作队列 (Work Queues): 消息分发给多个消费者,实现负载均衡。消费者竞争消费消息。
  3. 发布/订阅 (Publish/Subscribe): 通过 Fanout 交换机广播消息到所有绑定队列。适合日志系统。
  4. 路由 (Routing): 使用 Direct 交换机,根据路由键选择性路由消息。
  5. 主题 (Topics): 使用 Topic 交换机,根据模式匹配路由键(如 “log.*”)路由消息。
  6. RPC (Remote Procedure Call): 实现同步调用,客户端等待响应。

选择模式取决于应用需求,如广播 vs. 选择性路由。

高级主题

  • 消息确认 (Acknowledgment): 消费者确认消息处理成功,防止丢失。支持手动/自动确认。
  • 持久化 (Persistence): 队列和消息标记为持久化,重启后保留。
  • 死信队列 (Dead Letter Queues): 处理无法消费的消息(如过期或拒绝)。
  • TTL (Time-To-Live): 为消息或队列设置过期时间。
  • 优先级队列: 消息带有优先级,高优先级先消费。

这些功能提升系统的可靠性和灵活性。

安装

安装Erlang

https://www.erlang.org/downloads 下载对应版本

windows下配置Erlang环境变量

  1. 安装到指定目录
    install_dir
  2. 配置环境变量
    1. 新建ERLANG_HOME系统变量,值为解压目录
      系统变量
    2. 编辑Path环境变量,添加%ERLANG_HOME%\bin
      环境变量
  3. 测试安装
    1. WIN+R 输入cmd回车打开命令行工具
    2. 输入erl -version
    3. 显示版本信息则安装成功
    1
    2
    $ erl -version
    Erlang (SMP,ASYNC_THREADS) (BEAM) emulator version 16.0.2

安装RabbitMq

https://www.rabbitmq.com/release-information 下载对应版本安装

Windows 安装

  1. RabbitMQ 官网 下载 RabbitMQ 安装程序(.exe 文件)。
  2. 运行安装程序,按照提示完成安装(默认设置通常即可)。
  3. 安装后,RabbitMQ 服务会自动启动。
  4. (可选)配置环境变量:添加 RabbitMQ 的 sbin 目录到 PATH,例如 C:\Program Files\RabbitMQ\rabbitmq_server-x.x.x\sbin

注意:确保 Erlang 已正确安装并配置环境变量,如前文所述。

Linux 安装(Ubuntu 示例)

  1. 更新包列表:sudo apt update
  2. 安装 Erlang:sudo apt install erlang
  3. 添加 RabbitMQ 仓库:
    1
    2
    3
    4
    5
    6
    sudo apt install curl gnupg apt-transport-https -y
    curl -1sLf 'https://keys.openpgp.org/vks/v1/by-fingerprint/0A9AF2115F4687BD29803A206B73A36E6026DFCA' | sudo gpg --dearmor | sudo tee /usr/share/keyrings/com.rabbitmq.team.gpg > /dev/null
    curl -1sLf 'https://github.com/rabbitmq/rabbitmq-delayed-message-exchange/releases/download/v3.13.0/rabbitmq_delayed_message_exchange-3.13.0.ez' > /usr/lib/rabbitmq/lib/rabbitmq_server-3.13.0/plugins/rabbitmq_delayed_message_exchange-3.13.0.ez
    curl -1sLf https://ppa1.novemberain.com/gpg.E495BB49CC4BBE5B.key | sudo gpg --dearmor | sudo tee /usr/share/keyrings/rabbitmq.E495BB49CC4BBE5B.gpg > /dev/null
    curl -1sLf https://ppa1.novemberain.com/rabbitmq/rabbitmq-erlang/deb/ubuntu focal main | sudo tee /etc/apt/sources.list.d/rabbitmq.list
    curl -1sLf https://ppa1.novemberain.com/rabbitmq/rabbitmq-server/deb/ubuntu focal main | sudo tee /etc/apt/sources.list.d/rabbitmq.list
  4. 更新并安装:sudo apt update && sudo apt install rabbitmq-server -y
  5. 启动服务:sudo systemctl start rabbitmq-server
  6. 启用开机启动:sudo systemctl enable rabbitmq-server

// 删除重复的 Linux 部分

  1. 更新包列表:sudo apt update
  2. 安装 Erlang:sudo apt install erlang
  3. 添加 RabbitMQ 仓库并安装:参考官方文档,运行:
    1
    2
    3
    4
    5
    sudo apt install curl gnupg apt-transport-https -y
    curl -1sLf 'https://dl.cloudsmith.io/public/rabbitmq/rabbitmq-erlang/gpg.key' | sudo gpg --dearmor | sudo tee /usr/share/keyrings/rabbitmq-archive-keyring.gpg > /dev/null
    // 添加更多仓库配置...
    sudo apt update
    sudo apt install rabbitmq-server -y
  4. 启动服务:sudo systemctl start rabbitmq-server

macOS 安装(使用 Homebrew)

  1. 安装 Homebrew(如果未安装):/bin/bash -c "$(curl -fsSL https://raw.githubusercontent.com/Homebrew/install/HEAD/install.sh)"
  2. 安装 RabbitMQ:brew install rabbitmq
  3. 启动服务:brew services start rabbitmq

启用插件

1
2
3
4
5
6
7
8
9
10
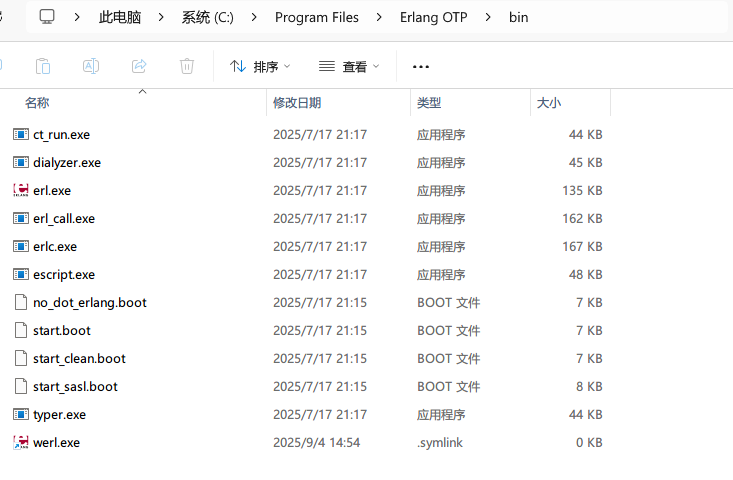
D:\Program Files\FlyEnv\PhpWebStudy-Data\app\rabbitmq-4.0.9\sbin
$ rabbitmq-plugins.bat enable rabbitmq_management
Enabling plugins on node rabbit@PC-20250304DZOI:
rabbitmq_management
The following plugins have been configured:
rabbitmq_management
rabbitmq_management_agent
rabbitmq_web_dispatch
Applying plugin configuration to rabbit@PC-20250304DZOI...
Plugin configuration unchanged.

启动RabbitMq

1
2
3
4
5
6
7
8
9
10
11
12
13
14
15
16
17
18
19
20
21
22
23
24
25
26
27
28
$ rabbitmq-server.bat
=INFO REPORT==== 4-Sep-2025::15:53:55.045000 ===
alarm_handler: {set,{system_memory_high_watermark,[]}}
2025-09-04 15:53:57.062000+08:00 [notice] <0.45.0> Application syslog exited with reason: stopped
2025-09-04 15:53:57.069000+08:00 [notice] <0.213.0> Logging: switching to configured handler(s); following messages may not be visible in this log output

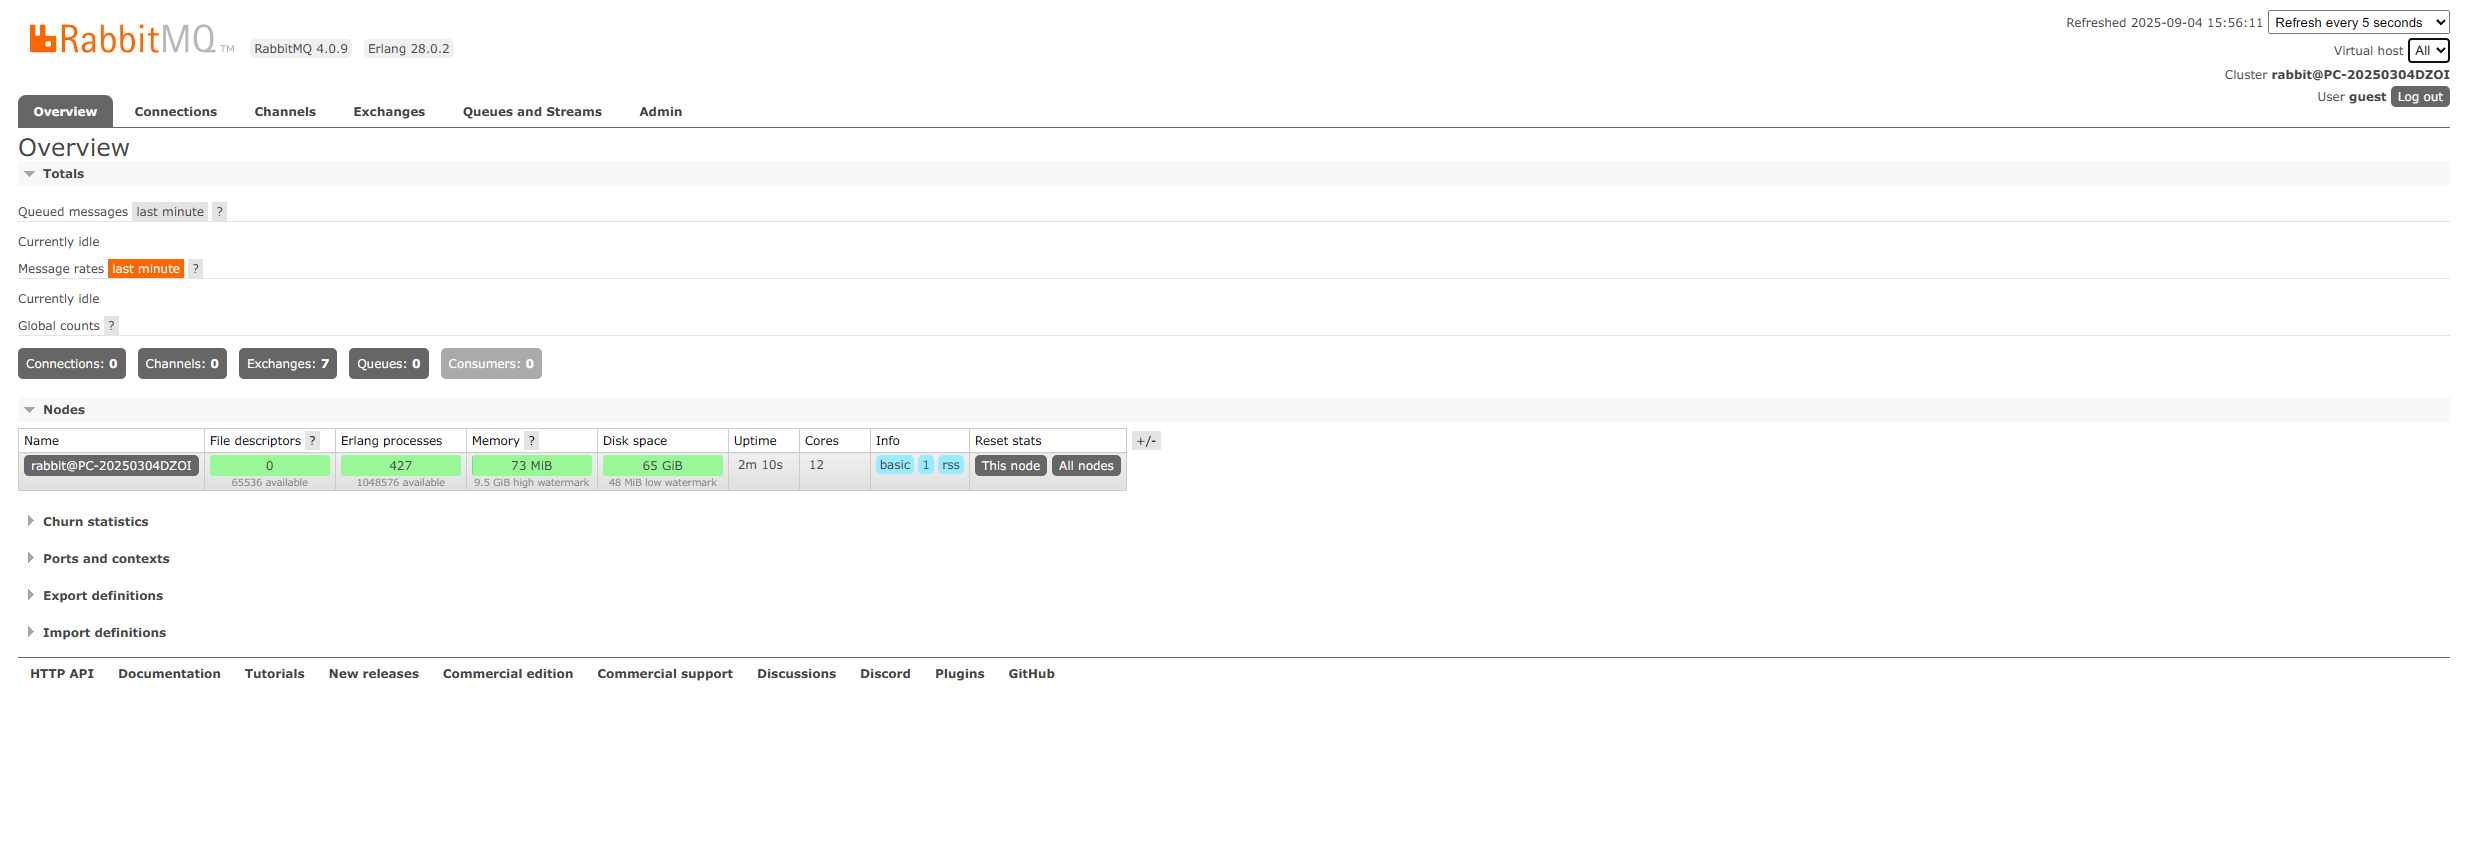
## ## RabbitMQ 4.0.9
## ##
########## Copyright (c) 2007-2025 Broadcom Inc and/or its subsidiaries
###### ##
########## Licensed under the MPL 2.0. Website: https://rabbitmq.com

Erlang: 28.0.2 [jit]
TLS Library: OpenSSL - OpenSSL 3.1.0 14 Mar 2023
Release series support status: see https://www.rabbitmq.com/release-information

Doc guides: https://www.rabbitmq.com/docs
Support: https://www.rabbitmq.com/docs/contact
Tutorials: https://www.rabbitmq.com/tutorials
Monitoring: https://www.rabbitmq.com/docs/monitoring
Upgrading: https://www.rabbitmq.com/docs/upgrade

Logs: <stdout>
c:/Users/JT/AppData/Roaming/RabbitMQ/log/rabbit@PC-20250304DZOI.log

Config file(s): (none)

Starting broker... completed with 3 plugins.

打开管理界面查看

thinkphp示例

安装composer包

1
composer require php-amqplib/php-amqplib

生产者

1
2
3
4
5
6
7
8
9
10
11
12
13
14
15
16
17
18
19
20
21
22
23
24
25
26
27
28
29
30
31
32
33
34
35
36
37
38
39
40
41
42
43
44
45
46
47
48
49
50
51
52
53
54
55
56
57
58
59
60
61
62
63
64
<?php
namespace app\controller;

use PhpAmqpLib\Connection\AMQPStreamConnection;
use PhpAmqpLib\Message\AMQPMessage;
use think\facade\Db;
use Throwable;

class Order
{
public function createOrder()
{
try {
$result = Db::name('order')->insertGetId([
'user_id' => 1,
'price' => 99.99,
'createTime' => date('Y-m-d H:i:s')
]);

// 定义RabbitMQ连接配置
$config = [
'host' => '127.0.0.1',
'port' => 5672,
'user' => 'guest',
'password' => 'guest',
'vhost' => '/'
];

// 创建连接
$connection = new AMQPStreamConnection(
$config['host'],
$config['port'],
$config['user'],
$config['password'],
$config['vhost']
);

// 创建通道
$channel = $connection->channel();

// 声明队列(持久化以提高可靠性)
$channel->queue_declare('order_queue', false, true, false, false); // durable: true

// 创建消息(设置持久化)
$message = new AMQPMessage(json_encode([
'orderId' => $result,
'expireTime' => 15
]), ['delivery_mode' => AMQPMessage::DELIVERY_MODE_PERSISTENT]);

// 发布消息
$channel->basic_publish($message, '', 'order_queue');

// 关闭通道和连接
$channel->close();
$connection->close();

echo "订单创建成功,订单ID为:{$result}";
} catch (Throwable $e) {
// 错误处理:记录日志或回滚
error_log("Order creation failed: " . $e->getMessage());
echo "订单创建失败: " . $e->getMessage();
}
}
}

消费者

1
2
3
4
5
6
7
8
9
10
11
12
13
14
15
16
17
18
19
20
21
22
23
24
25
26
27
28
29
30
31
32
33
34
35
36
37
38
39
40
41
42
43
44
45
46
47
48
49
50
51
52
53
54
55
56
57
58
59
60
61
62
63
64
65
66
67
68
69
70
71
72
73
74
75
76
77
78
79
80
81
82
83
84
85
86
87
88
89
90
91
92
93
94
95
# app\command\OrderConsumer.php
<?php
declare (strict_types = 1);

namespace app\command;

use think\console\Command;
use think\console\Input;
use think\console\Output;
use PhpAmqpLib\Connection\AMQPStreamConnection;
use PhpAmqpLib\Message\AMQPMessage;

class OrderConsumer extends Command
{
protected function configure()
{
// 指令配置
$this->setName('OrderConsumer')
->setDescription('RabbitMQ订单消费');
}

protected function execute(Input $input, Output $output)
{
try {
// 连接RabbitMQ配置
$config = [
'host' => '127.0.0.1',
'port' => 5672,
'user' => 'guest',
'password' => 'guest',
'vhost' => '/'
];

$connection = new AMQPStreamConnection(
$config['host'],
$config['port'],
$config['user'],
$config['password'],
$config['vhost']
);

$channel = $connection->channel();

// 声明队列(持久化)
$channel->queue_declare('order_queue', false, true, false, false);

// 定义回调函数
$callback = function (AMQPMessage $message) use ($output) {
try {
$data = json_decode($message->getBody(), true);
$orderId = $data['orderId'] ?? null; // 修复键名一致性

if ($orderId === null) {
throw new \Exception("Invalid message format");
}

$output->writeln('OrderConsumer: ' . $orderId);

// 手动确认消息
$message->ack();
} catch (\Throwable $e) {
// 处理失败:拒绝消息并重新入队或移到死信队列
$message->nack(true); // requeue: true
$output->writeln('Error processing message: ' . $e->getMessage());
}
};

// 消费消息(no_ack = false 表示手动确认)
$channel->basic_consume('order_queue', '', false, false, false, false, $callback);

// 循环等待消息
while ($channel->is_consuming()) {
$channel->wait();
}

// 清理
$channel->close();
$connection->close();
} catch (\Throwable $e) {
$output->writeln('Consumer error: ' . $e->getMessage());
}
}
}

# config\console.php
<?php
// +----------------------------------------------------------------------
// | 控制台配置
// +----------------------------------------------------------------------
return [
// 指令定义
'commands' => [
'orderConsumer' => 'app\command\OrderConsumer',
],
];

性能考虑

  • 连接重用:在生产环境中,使用连接池避免频繁创建连接。
  • 批量处理:消费者可批量确认消息以提高吞吐量。
  • 预取消息:使用 basic_qos 限制预取消息数,防止消费者过载,例如 $channel->basic_qos(null, 1, null);

查看指令

1
2
3
4
5
6
7
8
9
10
11
12
13
14
15
16
17
18
19
20
21
22
23
24
25
26
27
28
29
30
31
32
33
34
35
36
37
38
39
40
41
42
$ php think 
version 8.1.3

Usage:
command [options] [arguments]

Options:
-h, --help Display this help message
-V, --version Display this console version
-q, --quiet Do not output any message
--ansi Force ANSI output
--no-ansi Disable ANSI output
-n, --no-interaction Do not ask any interactive question
-v|vv|vvv, --verbose Increase the verbosity of messages: 1 for normal output, 2 for more verbose output and 3 for debug

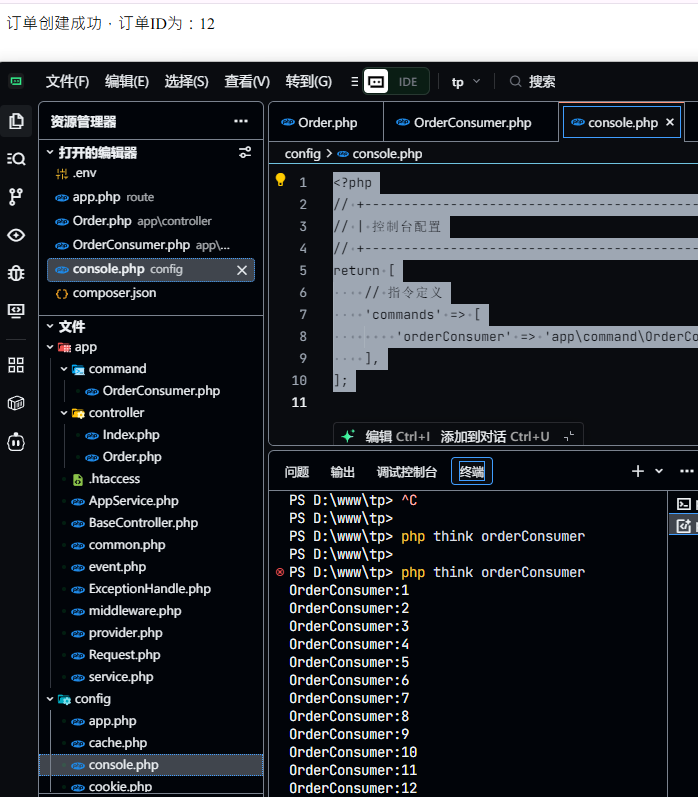
Available commands:
clear Clear runtime file
help Displays help for a command
list Lists commands
orderConsumer RabbitMQ订单消费
run PHP Built-in Server for ThinkPHP
version show thinkphp framework version
make
make:command Create a new command class
make:controller Create a new resource controller class
make:event Create a new event class
make:listener Create a new listener class
make:middleware Create a new middleware class
make:model Create a new model class
make:service Create a new Service class
make:subscribe Create a new subscribe class
make:validate Create a validate class
optimize
optimize:config Build config cache.
optimize:route Build app route cache.
optimize:schema Build database schema cache.
route
route:list show route list.
service
service:discover Discover Services for ThinkPHP
vendor
vendor:publish Publish any publishable assets from vendor packages

启动消费者监听

1
$ php think orderConsumer

测试

生产消息

1
浏览器打开 http://127.0.0.1:8000/createOrder

订单创建成功

查看消费者消息

消费者接收消息